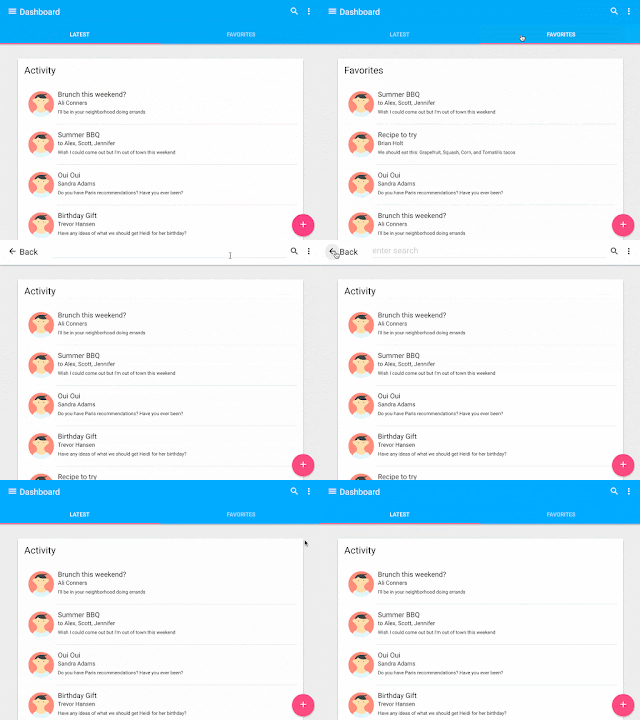
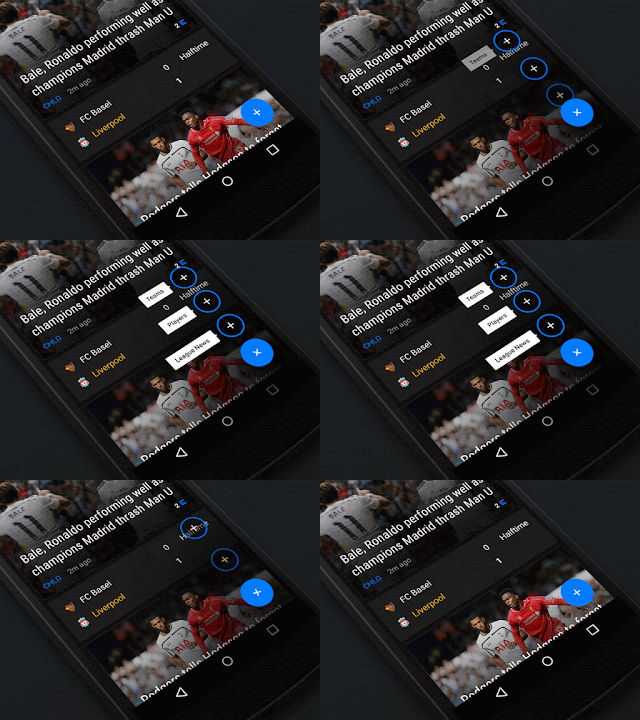
Saturday 19 March 2016

Android Material Navigation Drawer Fragment via Activities and FAB, Snackbar using Android studio

Android Material Navigation Drawer Fragment via Activities and FAB, Snackbar 
Using Android Studio 


Note: We have two methods to create Nested scrolling collapsing Activity

Method 1:

1. Create a android studio project 
  •         Open new project
  •         Fill the details 
  •         Next activity screen "Navigation Drawer Activity"


And Click finish

It takes some time to finish loading...

Now You Create the Navigation Drawer Material Design successfully.


Method 2:

If you need to include nested scrolling into your project steps are below:

1. Create a New Xml file(Right click the layout folder on Android studio).

activity_main.xml
<?xml version="1.0" encoding="utf-8"?>
<android.support.v4.widget.DrawerLayout
    xmlns:android="http://schemas.android.com/apk/res/android"
    xmlns:app="http://schemas.android.com/apk/res-auto"
    xmlns:tools="http://schemas.android.com/tools"
    android:id="@+id/drawer_layout" 
   android:layout_width="match_parent" 
   android:layout_height="match_parent"
    android:fitsSystemWindows="true" 
   tools:openDrawer="start">

    <include        layout="@layout/app_bar_main"
        android:layout_width="match_parent"   
     android:layout_height="match_parent" />

    <android.support.design.widget.NavigationView 
       android:id="@+id/nav_view" 
       android:layout_width="wrap_content" 
       android:layout_height="match_parent"  
      android:layout_gravity="start"   
     android:fitsSystemWindows="true" 
       app:headerLayout="@layout/nav_header_main" 
       app:menu="@menu/activity_main_drawer" />

</android.support.v4.widget.DrawerLayout>


2. Create a New Xml file(Right click the layout folder on Android studio).
app_bar_main.xml
<?xml version="1.0" encoding="utf-8"?> <android.support.design.widget.CoordinatorLayout xmlns:android="http://schemas.android.com/apk/res/android" xmlns:app="http://schemas.android.com/apk/res-auto" xmlns:tools="http://schemas.android.com/tools" android:layout_width="match_parent" android:layout_height="match_parent" android:fitsSystemWindows="true" tools:context="com.example.mmmllc.myapplication.MainActivity"> <android.support.design.widget.AppBarLayout android:layout_height="wrap_content" android:layout_width="match_parent" android:theme="@style/AppTheme.AppBarOverlay"> <android.support.v7.widget.Toolbar android:id="@+id/toolbar" android:layout_width="match_parent" android:layout_height="?attr/actionBarSize" android:background="?attr/colorPrimary" app:popupTheme="@style/AppTheme.PopupOverlay" /> </android.support.design.widget.AppBarLayout> <android.support.design.widget.FloatingActionButton android:id="@+id/fab" android:layout_width="wrap_content" android:layout_height="wrap_content" android:layout_gravity="bottom|end" android:layout_margin="@dimen/fab_margin" android:src="@android:drawable/ic_dialog_email" /> </android.support.design.widget.CoordinatorLayout>


3. Create a New Xml file(Right click the layout folder on Android studio).
nav_header_main.xml
<?xml version="1.0" encoding="utf-8"?> <LinearLayout xmlns:android="http://schemas.android.com/apk/res/android" android:layout_width="match_parent" android:layout_height="@dimen/nav_header_height" android:background="@drawable/side_nav_bar" android:paddingBottom="@dimen/activity_vertical_margin" android:paddingLeft="@dimen/activity_horizontal_margin" android:paddingRight="@dimen/activity_horizontal_margin" android:paddingTop="@dimen/activity_vertical_margin" android:theme="@style/ThemeOverlay.AppCompat.Dark" android:orientation="vertical" android:gravity="bottom"> <ImageView android:layout_width="wrap_content" android:layout_height="wrap_content" android:paddingTop="@dimen/nav_header_vertical_spacing" android:src="@android:drawable/sym_def_app_icon" android:id="@+id/imageView" /> <TextView android:layout_width="match_parent" android:layout_height="wrap_content" android:paddingTop="@dimen/nav_header_vertical_spacing" android:text="Android Studio" android:textAppearance="@style/TextAppearance.AppCompat.Body1" /> <TextView android:layout_width="wrap_content" android:layout_height="wrap_content" android:text="android.studio@android.com" android:id="@+id/textView" /> </LinearLayout>

4. Create a Menu Xml file(Right click the Menu folder on Android studio).
activity_main_drawer.xml
<?xml version="1.0" encoding="utf-8"?> <menu xmlns:android="http://schemas.android.com/apk/res/android"> <group android:checkableBehavior="single"> <item android:id="@+id/nav_camera" android:icon="@drawable/ic_menu_camera" android:title="Import" /> <item android:id="@+id/nav_gallery" android:icon="@drawable/ic_menu_gallery" android:title="Gallery" /> <item android:id="@+id/nav_slideshow" android:icon="@drawable/ic_menu_slideshow" android:title="Slideshow" /> <item android:id="@+id/nav_manage" android:icon="@drawable/ic_menu_manage" android:title="Tools" /> </group> <item android:title="Communicate"> <menu> <item android:id="@+id/nav_share" android:icon="@drawable/ic_menu_share" android:title="Share" /> <item android:id="@+id/nav_send" android:icon="@drawable/ic_menu_send" android:title="Send" /> </menu> </item> </menu>

5. Copy this to Manifest.Xml file.
<?xml version="1.0" encoding="utf-8"?> <manifest xmlns:android="http://schemas.android.com/apk/res/android" package="com.example.mmmllc.myapplication" > <application android:allowBackup="true" android:icon="@mipmap/ic_launcher" android:label="@string/app_name" android:supportsRtl="true" android:theme="@style/AppTheme" > <activity android:name=".MainActivity" android:label="@string/app_name" android:theme="@style/AppTheme.NoActionBar" > <intent-filter> <action android:name="android.intent.action.MAIN" /> <category android:name="android.intent.category.LAUNCHER" /> </intent-filter> </activity> </application> </manifest>
6. Replace your Dependencies on "build.gradle".

dependencies {
 compile fileTree(dir: 'libs', include: ['*.jar']) 
 testCompile 'junit:junit:4.12'
 compile 'com.android.support:appcompat-v7:23.2.0'
 compile 'com.android.support:design:23.2.0' 
 Add inside into dependencies {  .........   }

if your gradle version is 23.2.0.. may be its changed by your project.. replace version number to <your version number>

Click And Run Application.
Now You Create the Navigation Drawer Material Design successfully.
Finally Create Nested Scrolling With Collapsing and FAB , Snackbar...
For Download this project:


Android Floating Labels Edit Text With Validation using android studio

Android Floating Labels Edit Text With Validation using Android Studio

Android floating labels were introduced in android design support library to display a floating label over EditText. It starts animating by moving to floating label position.


1. Create a New Xml file(Right click the layout folder on Android studio).

   activity_main.xml
<android.support.design.widget.CoordinatorLayout xmlns:android="http://schemas.android.com/apk/res/android"
    xmlns:app="http://schemas.android.com/apk/res-auto"
    android:layout_width="match_parent"
    android:layout_height="match_parent">

    <android.support.design.widget.AppBarLayout
        android:layout_width="match_parent"
        android:layout_height="wrap_content"
        android:theme="@style/ThemeOverlay.AppCompat.Dark.ActionBar">

        <android.support.v7.widget.Toolbar
            android:id="@+id/toolbar"
            android:layout_width="match_parent"
            android:layout_height="?attr/actionBarSize"
            android:background="?attr/colorPrimary"
            app:layout_scrollFlags="scroll|enterAlways"
            app:popupTheme="@style/ThemeOverlay.AppCompat.Light" />
    </android.support.design.widget.AppBarLayout>

    <LinearLayout
        android:layout_width="fill_parent"
        android:layout_height="match_parent"
        android:layout_marginTop="?attr/actionBarSize"
        android:orientation="vertical"
        android:paddingLeft="20dp"
        android:paddingRight="20dp"
        android:paddingTop="60dp">

        <android.support.design.widget.TextInputLayout
            android:id="@+id/input_layout_name"
            android:layout_width="match_parent"
            android:layout_height="wrap_content">

            <EditText
                android:id="@+id/input_name"
                android:layout_width="match_parent"
                android:layout_height="wrap_content"
                android:singleLine="true"
                android:hint="@string/hint_name" />
        </android.support.design.widget.TextInputLayout>

        <android.support.design.widget.TextInputLayout
            android:id="@+id/input_layout_email"
            android:layout_width="match_parent"
            android:layout_height="wrap_content">

            <EditText
                android:id="@+id/input_email"
                android:layout_width="match_parent"
                android:layout_height="wrap_content"
                android:inputType="textEmailAddress"
                android:hint="@string/hint_email" />
        </android.support.design.widget.TextInputLayout>

        <android.support.design.widget.TextInputLayout
            android:id="@+id/input_layout_password"
            android:layout_width="match_parent"
            android:layout_height="wrap_content">

            <EditText
                android:id="@+id/input_password"
                android:layout_width="match_parent"
                android:layout_height="wrap_content"
                android:inputType="textPassword"
                android:hint="@string/hint_password" />
        </android.support.design.widget.TextInputLayout>

        <Button android:id="@+id/btn_signup"
            android:layout_width="fill_parent"
            android:layout_height="wrap_content"
            android:text="@string/btn_sign_up"
            android:background="@color/colorPrimary"
            android:layout_marginTop="40dp"
            android:textColor="@android:color/white"/>

    </LinearLayout>

</android.support.design.widget.CoordinatorLayout>

2. Create a New Java file(Right click the Package folder on Android studio).

package <Your Package>; import android.os.Bundle; import android.support.design.widget.TextInputLayout; import android.support.v7.app.AppCompatActivity; import android.support.v7.widget.Toolbar; import android.text.Editable; import android.text.TextUtils; import android.text.TextWatcher; import android.view.View; import android.view.WindowManager; import android.widget.Button; import android.widget.EditText; import android.widget.Toast; public class MainActivity extends AppCompatActivity { private Toolbar toolbar; private EditText inputName, inputEmail, inputPassword; private TextInputLayout inputLayoutName, inputLayoutEmail, inputLayoutPassword; private Button btnSignUp; @Override protected void onCreate(Bundle savedInstanceState) { super.onCreate(savedInstanceState); setContentView(R.layout.activity_main); toolbar = (Toolbar) findViewById(R.id.toolbar); setSupportActionBar(toolbar); inputLayoutName = (TextInputLayout) findViewById(R.id.input_layout_name); inputLayoutEmail = (TextInputLayout) findViewById(R.id.input_layout_email); inputLayoutPassword = (TextInputLayout) findViewById(R.id.input_layout_password); inputName = (EditText) findViewById(R.id.input_name); inputEmail = (EditText) findViewById(R.id.input_email); inputPassword = (EditText) findViewById(R.id.input_password); btnSignUp = (Button) findViewById(R.id.btn_signup); inputName.addTextChangedListener(new MyTextWatcher(inputName)); inputEmail.addTextChangedListener(new MyTextWatcher(inputEmail)); inputPassword.addTextChangedListener(new MyTextWatcher(inputPassword)); btnSignUp.setOnClickListener(new View.OnClickListener() { @Override public void onClick(View view) { submitForm(); } }); } /** * Validating form */ private void submitForm() { if (!validateName()) { return; } if (!validateEmail()) { return; } if (!validatePassword()) { return; } Toast.makeText(getApplicationContext(), "Thank You!", Toast.LENGTH_SHORT).show(); } private boolean validateName() { if (inputName.getText().toString().trim().isEmpty()) { inputLayoutName.setError(getString(R.string.err_msg_name)); requestFocus(inputName); return false; } else { inputLayoutName.setErrorEnabled(false); } return true; } private boolean validateEmail() { String email = inputEmail.getText().toString().trim(); if (email.isEmpty() || !isValidEmail(email)) { inputLayoutEmail.setError(getString(R.string.err_msg_email)); requestFocus(inputEmail); return false; } else { inputLayoutEmail.setErrorEnabled(false); } return true; } private boolean validatePassword() { if (inputPassword.getText().toString().trim().isEmpty()) { inputLayoutPassword.setError(getString(R.string.err_msg_password)); requestFocus(inputPassword); return false; } else { inputLayoutPassword.setErrorEnabled(false); } return true; } private static boolean isValidEmail(String email) { return !TextUtils.isEmpty(email) && android.util.Patterns.EMAIL_ADDRESS.matcher(email).matches(); } private void requestFocus(View view) { if (view.requestFocus()) { getWindow().setSoftInputMode(WindowManager.LayoutParams.SOFT_INPUT_STATE_ALWAYS_VISIBLE); } } private class MyTextWatcher implements TextWatcher { private View view; private MyTextWatcher(View view) { this.view = view; } public void beforeTextChanged(CharSequence charSequence, int i, int i1, int i2) { } public void onTextChanged(CharSequence charSequence, int i, int i1, int i2) { } public void afterTextChanged(Editable editable) { switch (view.getId()) { case R.id.input_name: validateName(); break; case R.id.input_email: validateEmail(); break; case R.id.input_password: validatePassword(); break; } } } }


Floating Label with validation username and password using textinputLayout.


Run Application floating labels with errors using Text input Layout.


Android Nested Scrolling and Collapsing View using Android Studio

 Android Nested Scrolling and Collapsing View using Android Studio


Note: We have two methods to create Nested scrolling collapsing Activity

Method 1:
1. Create a android studio project 
  •         Open new project
  •         Fill the details 
  •         Next activity screen "Select Scrolling Activity"

And click Next And Finish

Now You Create the Nested Scrolling Activity successfully.


Method 2:

If you need to include nested scrolling into your project steps are below:

1. Create a New Xml file(Right click the layout folder on Android studio).

activity_scrolling.xml

<?xml version="1.0" encoding="utf-8"?><android.support.design.widget.CoordinatorLayout
 xmlns:android="http://schemas.android.com/apk/res/android"
    xmlns:app="http://schemas.android.com/apk/res-auto"
    xmlns:tools="http://schemas.android.com/tools"
    android:layout_width="match_parent"
    android:layout_height="match_parent"  
  android:fitsSystemWindows="true"
    tools:context="com.example.mmmllc.testsccroll.ScrollingActivity">

    <android.support.design.widget.AppBarLayout
        android:id="@+id/app_bar"
        android:layout_width="match_parent"
        android:layout_height="@dimen/app_bar_height"
        android:fitsSystemWindows="true"
        android:theme="@style/AppTheme.AppBarOverlay">

        <android.support.design.widget.CollapsingToolbarLayout
            android:id="@+id/toolbar_layout"
            android:layout_width="match_parent"
            android:layout_height="match_parent"
            android:fitsSystemWindows="true"  
          app:contentScrim="?attr/colorPrimary" 
           app:layout_scrollFlags="scroll|exitUntilCollapsed">

            <android.support.v7.widget.Toolbar 
               android:id="@+id/toolbar"  
              android:layout_width="match_parent"
                android:layout_height="?attr/actionBarSize" 
               app:layout_collapseMode="pin"  
              app:popupTheme="@style/AppTheme.PopupOverlay" />
        </android.support.design.widget.CollapsingToolbarLayout>

    </android.support.design.widget.AppBarLayout>


    <!------  you need to add your design own work here   ------!>


    <android.support.design.widget.FloatingActionButton  
     android:id="@+id/fab"
        android:layout_width="wrap_content" 
       android:layout_height="wrap_content" 
      android:layout_margin="@dimen/fab_margin"
        android:src="@android:drawable/ic_dialog_email" 
       app:layout_anchor="@id/app_bar"     
   app:layout_anchorGravity="bottom|end" />

</android.support.design.widget.CoordinatorLayout>


2. Create a New Java file(Right click the Package folder on Android studio).
ScrollingActivity.java
package <Replace your Package>;

import android.os.Bundle;
import android.support.design.widget.FloatingActionButton;
import android.support.design.widget.Snackbar;
import android.support.v7.app.AppCompatActivity;
import android.support.v7.widget.Toolbar;
import android.view.View;
import android.view.Menu;
import android.view.MenuItem;

public class ScrollingActivity extends AppCompatActivity {

    @Override    protected void onCreate(Bundle savedInstanceState) {
        super.onCreate(savedInstanceState);
        setContentView(R.layout.activity_scrolling);
        Toolbar toolbar = (Toolbar) findViewById(R.id.toolbar);
        setSupportActionBar(toolbar);

        FloatingActionButton fab = (FloatingActionButton) findViewById(R.id.fab);
        fab.setOnClickListener(new View.OnClickListener() {
            @Override            public void onClick(View view) {
                Snackbar.make(view, "Replace with your own action", Snackbar.LENGTH_LONG)
                        .setAction("Action", null).show();
            }
        });
/////Add whatever in your code to execute there } }

3. Replace your Dependencies on "build.gradle".


compile 'com.android.support:appcompat-v7:23.2.0'

compile 'com.android.support:design:23.2.0'


Add inside into dependencies {  .........   }

if your gradle version is 23.2.0.. may be its changed by your project.. replace version number to <your version number>


Finally Create Nested Scrolling With Collapsing and FAB , Snackbar...

For Download this project:


DOWNLOAD NOW


Android Floating Action Button(FAB) With SnackBar Material Design : How To create a FAB with Snack bar using Android Studio

Floating Action Button With SnackBar
Material Design


Note: In this Category  Android studio make default view with Floating Action Button and Snack bar, If you create a new Project click any activity with including FAB.

"Create a new Project and next blank activity
you will see the FAB with snackbar"

1.Add your support  file on "build.gradle" inside your app folder

compile 'com.android.support:appcompat-v7:23.2.0'
compile 'com.android.support:design:23.2.0'

Add inside into dependencies {  .........   }
if your gradle version is 23.2.0.. may be its changed by your project.. replace version number to <your version number>


2. This is a xml file to placing your layout file

<android.support.design.widget.FloatingActionButton
    android:id="@+id/fab"
android:layout_width="wrap_content"
android:layout_height="wrap_content"
    android:layout_gravity="bottom|end"
    android:src="@drawable/ic_launcher"
    android:layout_alignParentRight="true"
    android:layout_alignParentEnd="true"  />


Add inside into <your Layout File> Example: activity_main.xml


3.Java file code <update coding to your Java File>

FloatingActionButton fab = (FloatingActionButton)findViewById(R.id.fab);
fab.setOnClickListener(new View.OnClickListener() {
   @Override   public void onClick(View view) {

         Snackbar.make(view, "Replace your Own Action", Snackbar.LENGTH_LONG)
               .setAction("Action", null).show();
 
} });


Floating Action Button With SnackBar
Material Design


Friday 18 March 2016

Android Studio Support Services, Support design and Appcompact with gradle support.

Android Studio Support Services 

Support  Design and AppCompact with Gradle


Floating Action Button with Promotions


Nested Scrolling Collapsing View

Floating Labels with Validation


4. Material Navigation Fragment with Activities

Material Navigation with FAB Using Activities