How To Add Custom Marker, My Location, Views & Zoom Controls on your Map Application using Android Studio
Requirements
***Android studio
***map application project
***checking SDK files
***checking SDK files
Note:
Android studio blog here
create map application project here
"Internet connection should be connect when you build your applictaion"
"Internet connection should be connect when you build your applictaion"
Simple Steps
1. open your project on your android studio
Note: Already map application created by another blog.

2.Checking SDK files
Tools--->SDK manager
Goto extras files like "repository, library, all play services, drivers".

NOTE: All Extras files should must be download with complete updates
3. open main activity.java file

4. Goto top of the page
You see the "import ..."
Click the import you will see the list of imports

4. Add the some other imports
import android.content.Context;
import android.location.Criteria;
import android.location.Location;
import android.location.LocationManager;
import com.google.android.gms.maps.CameraUpdateFactory;
5. Goto down of page
You see the "private void setUpMap()"
Already some code there...
Put on the code below in "private void setUpMap()"
mMap.setMyLocationEnabled(true);
LocationManager locationManager = (LocationManager) getSystemService(Context.LOCATION_SERVICE);
Criteria criteria = new Criteria();
String provider = locationManager.getBestProvider(criteria, true);
Location myLocation = locationManager.getLastKnownLocation(provider);
mMap.setMapType(GoogleMap.MAP_TYPE_NORMAL);
double latitude = myLocation.getLatitude();
double longitude = myLocation.getLongitude();
LatLng latLng = new LatLng(latitude, longitude);
mMap.moveCamera(CameraUpdateFactory.newLatLng(latLng));
mMap.animateCamera(CameraUpdateFactory.zoomTo(14));
You will get some yellow marker warnings. Dont worry about that.
Now you can run the application and see map and my location zoom controls.

6. Change views on the map
Tools--->SDK manager
Goto extras files like "repository, library, all play services, drivers".
NOTE: All Extras files should must be download with complete updates
3. open main activity.java file
You see the "import ..."
Click the import you will see the list of imports
4. Add the some other imports
import android.content.Context;
import android.location.Criteria;
import android.location.Location;
import android.location.LocationManager;
import com.google.android.gms.maps.CameraUpdateFactory;
5. Goto down of page
You see the "private void setUpMap()"
Already some code there...
Put on the code below in "private void setUpMap()"
mMap.setMyLocationEnabled(true);
LocationManager locationManager = (LocationManager) getSystemService(Context.LOCATION_SERVICE);
Criteria criteria = new Criteria();
String provider = locationManager.getBestProvider(criteria, true);
Location myLocation = locationManager.getLastKnownLocation(provider);
mMap.setMapType(GoogleMap.MAP_TYPE_NORMAL);
double latitude = myLocation.getLatitude();
double longitude = myLocation.getLongitude();
LatLng latLng = new LatLng(latitude, longitude);
mMap.moveCamera(CameraUpdateFactory.newLatLng(latLng));
mMap.animateCamera(CameraUpdateFactory.zoomTo(14));
You will get some yellow marker warnings. Dont worry about that.
Now you can run the application and see map and my location zoom controls.
6. Change views on the map
mMap.setMapType(GoogleMap.MAP_TYPE_NORMAL);
You see the code on above codes & just change to
If u want satellite view copy and replace the code:
mMap.setMapType(GoogleMap.MAP_TYPE_SATELLITE);If u want terrain view copy and replace the code:mMap.setMapType(GoogleMap.MAP_TYPE_TERRAIN);Results:


NORMAL SATELLITE TERRAIN
7. Add permissions on your "Androidmanifest.xml"

Double click "Androidmanifest.xml"
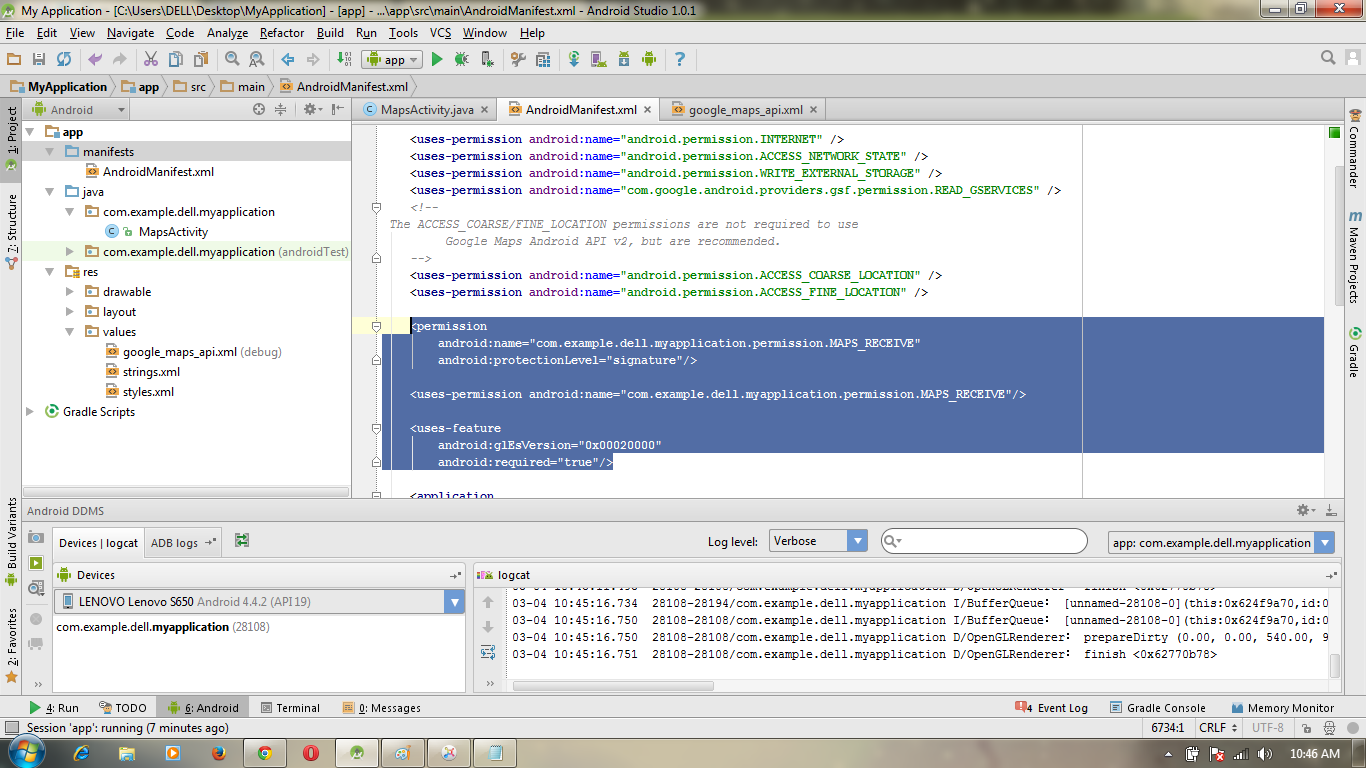

<permission
android:name="com.example.dell.myapplication.permission.MAPS_RECEIVE"
android:protectionLevel="signature"/>
<uses-permission android:name="com.example.dell.myapplication.permission.MAPS_RECEIVE"/>
<uses-feature
android:glEsVersion="0x00020000"
android:required="true"/>
NOTE: i show you on my application package name. so you will need to change your package name in manifest code. my package name is"com.example.dell.myapplication". so you should change, its important.
DOWNLOAD: SOURCE CODE: CLICK here
No comments:
Post a Comment